Our Holiday Tree!
For our fourth Christmas, we got a small fake evergreen tree (18-24 inches), and decorated it with small ornaments. I realized that we need not pack the tree away for the rest of the year, but instead could just change the decorations to go with other holidays throughout the year. We've quite enjoyed making new ornaments for it every month or two, and the kids hang them up all by themselves (and don't notice that I later distribute them a bit more evenly). Next year we'll just use the same ornaments, but maybe in a few years when their art skills are notably different, we might decide to make a new set - if they're still interested.
This is an pretty easy project to do with kids of almost any age (we started at age 3). You can can pick and choose what holidays your family likes to celebrate (as long as you can think how to decorate for it!), and if you have a long stretch between holidays that includes a family birthday, a birthday-themed tree is nice to do, too. I could also see doing an alphabet tree or a number tree. You're only limited by your imagination.
Here's a look at our tree through the year:
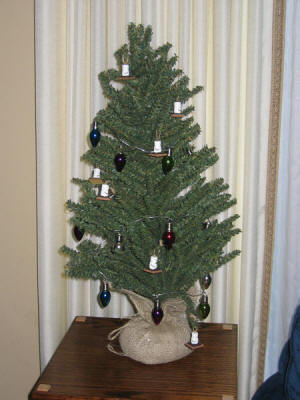
For our first
Christmas tree version, we just used some small ornaments we had on hand.
This year I think we'll make and/or buy some more to get it decorated more
fully. And we definitely need to make a topper for the tree; I tried to
buy one but found nothing that was made to go on a tree this size.
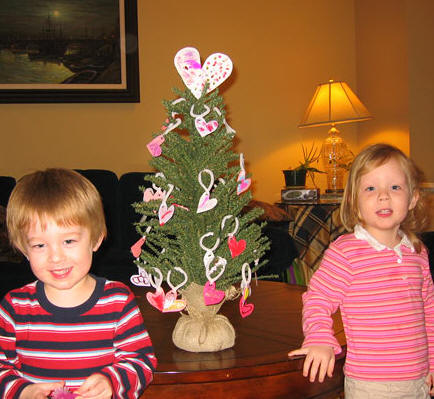
For Valentines day, I cut hearts out of card stock (as it has a nice weight to it, it works better than construction paper is likely too) in appropriate colors of red, pink, lavender, white. We used markers and glitter glue to decorate the cards, in the same colors, and also some foam heart stickers.
I punched a hole in the corner of each one, and put a chenille stem (cut in half) through each to make a loop for hanging. Where the chenille goes through the ornament, I gave it a little twist so that the heart will face forward when hung. These loops work much better than a string would for toddlers to hang themselves, since they make a nice stiff circle. You could also use a stiff ribbon, and that wouldn't have the pointy ends that the chenilles do.
The topper is just a
larger heart cut from card stock, using a chenille wrapped into a spiral and
glued down to hold it on the tree.
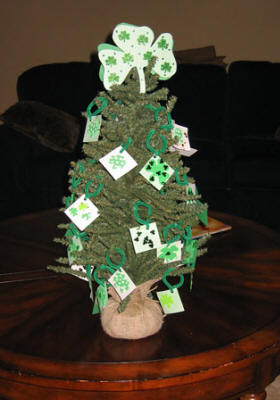
For St. Patrick's Day, I quickly decided that cutting the cards into shamrock shapes would drive me batty (the hearts almost did last month), and so just cut squares of green and white. A paper cutter really helps with this (and is useful for so many other projects). The ornament cards were decorated with foam shamrock stickers and shamrock confetti.
I made two toppers
this time, and attached them back to back to a spiraled chenille (with tape this
time; quicker than glue and it holds up well enough). Using two toppers
like this has become the norm, so that there isn't an obvious back side to the
tree. And I've taken to decorating it myself so that I get a bit of fun
with crafty stuff, and then I surprise the kids with it.
|
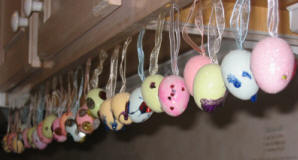
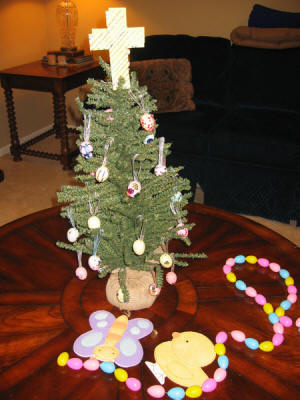
For Easter, I
found small plain egg ornaments at the craft store, which we then
applied glitter glue and some confetti to. The confetti didn't work so
well, as it was large and flat and stuck out from the curved surface of
the eggs, but it stayed on a few of them. I would, however,
recommend the use of the paint-on glitter glue pots that have small
confetti bits in them, as they stick well. We used a couple
varieties of that which seemed appropriate: springtime chicks,
butterflies, and hearts.
As the eggs weren't nice flat cards and were "painted" all around with glitter glue, there was then a bit of an issue of what do with them to dry. Luckily ingenuity struck. I attached a long strip of packing tape to the edge of my kitchen cabinets, so that half of it hung off the edge. Then I could just stick the ribbon loop to the tape. This worked quite well, though I did need to put strips of paper towels under the eggs as a few dripped. We did a cross as a topper, as our family celebrates Easter as a Christian holiday. For those that don't, there are many choices: giant egg, chick, bunny, butterfly, etc. |
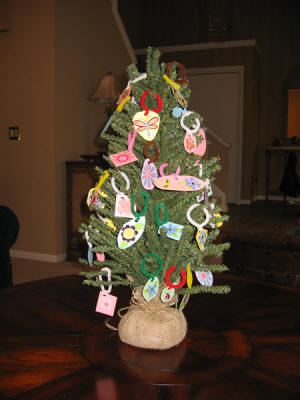
We were a little unsure of what holiday to decorate for next, and settled finally on a springtime/Mother's Day tree. We bought flower stickers and pretty bugs. Because these stickers were much larger and hard to get centered on a small square so that they didn't hang off the edge, the kids put them down on larger strips of card stock in pastel colors, which I then cut apart in various shapes.
We ended up not doing a topper, and I don't think the tree looks bad without one. But maybe next year we will make one.
We never did come up
with a tree for June, but you could try a Father's Day tree if you can decide
how to decorate it. Perhaps if you can find stickers with a bbq grill,
golf, or other 'guy' things. Or maybe something that's unique to your
family's daddy (hmm, that'd be computers for ours, but hard to find stickers
for). Or you could make a summertime tree with sun, lemonade, swimsuits,
etc.
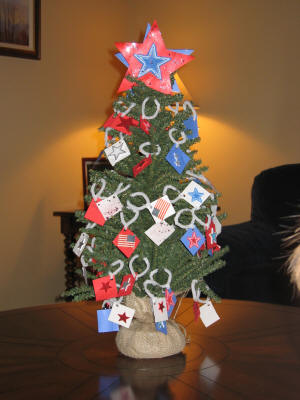
Our Independence
tree was made late (in August, but we enjoyed finally getting it done). We
used foam star stickers, patriotic glitter glue pot, and little flags (the kind
that come on toothpicks, with the end broken off).
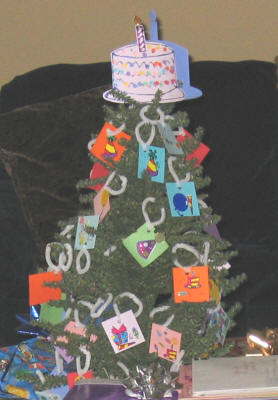
Our kids were born
in September, so we decided to make a birthday tree for this month. This
time we use many bright colors of card stock, and found appropriate stickers
such as party hats and presents and cake. The topper was especially fun to
make, and the kids glued on the confetti circles made when the ornament cards
were punched for hanging.
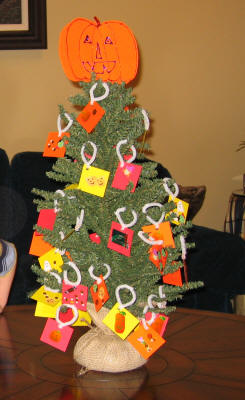
For October the obvious holiday is Halloween. We used a variety of Halloween stickers (pumpkins, candy, costume masks) on red, orange, and yellow cards (black cards would be nice too, but I had none on hand).
I'll have a picture
of our November Autumn/Thanksgiving tree soon. Stickers used include
turkeys, fall leaves, and some harvest pictures such as scarecrows, straw, and
tractors. We also used some leaf confetti. Card colors are yellow,
orange, red, and purple. Brown would have been good to use to, but again I
didn't have any. The topper is adorable - I traced their hands to make
turkeys.
Next year I think we'll make at least one more new set of ornaments: snowflakes and snowmen for a Winter tree.
If you try this, you will of course generate a lot of ornaments over the year, which you'll probably want to save in an organized manner for next year (unless you want to make all new ones). I've found that there's a great product called SnapWare that's easily found at Christmas time, for storing ornaments. It's a multi-layer box, and each layer snaps to the next one so that it's easy to get to just the one you need. The small-size one they makes works quite nicely, with one or two holiday's worth of ornaments per layer.